Microsoft ”CodePush“
CodePush is a cloud service that enables React Native & Cordova developers to deploy mobile app updates instantly to their users’ devices.
How it works ?
Microsoft CodePush is a service that allows developers to deploy mobile app updates directly to users’ devices. It’s particularly useful for React Native apps, as it enables developers to push updates without going through the usual app store submission process.
Here’s how CodePush works:
- Integration
- React Native Integration: Developers integrate the CodePush SDK into their React Native applications. This involves installing the CodePush package and linking it with the app.
- Code Updates
- Content to Update: CodePush allows you to update JavaScript, images, and other assets. It cannot update native code (e.g., compiled Java or Swift code), so any changes to native modules must go through the app store.
- Pushing Updates
- CodePush CLI: Developers use the CodePush Command Line Interface (CLI) to deploy updates. The CLI enables you to upload changes to the CodePush server, specifying the target app and deployment (e.g., staging or production).
- Release Process: After making changes to your codebase, you create a release with the CLI. The new release is uploaded to CodePush, where it becomes available for download.
- Client Side
- App Checks for Updates: When the app starts or at defined intervals, it checks the CodePush server for updates. This is managed by the CodePush SDK integrated into the app.
- Silent and Mandatory Updates: Developers can configure updates to be either silent (downloaded in the background) or mandatory (forcing the user to update before proceeding).
- Deployment
- Install Updates: If an update is available, it is downloaded to the device. CodePush handles the update installation seamlessly, either immediately or on the next app restart, based on developer preferences.
- Rollback: If an update causes issues, developers can roll back to a previous version via the CLI, and the app will revert to the last stable update.
Benefits of CodePush
- Rapid Deployment: Allows developers to deploy bug fixes and feature updates instantly without waiting for app store approval.
- User Experience: Improves user experience by reducing the time users wait for updates.
- Testing and Rollback: Supports staged rollouts and rollback functionality for safer updates.
Use Cases
- Bug Fixes: Quickly deploy fixes for critical bugs without submitting a new app version.
- Content Updates: Update static content and resources dynamically without impacting the core app functionality.
Limitations
- Native Code Changes: CodePush cannot push changes to native modules; such updates require traditional app store submissions.
- File Size: Large updates may still need to go through app stores due to size constraints and limitations.
A React Native app is composed of JavaScript files and any accompanying images, which are bundled together by the packager and distributed as part of a platform-specific binary (i.e. an .ipa or .apk file). Once the app is released, updating either the JavaScript code (e.g. making bug fixes, adding new features) or image assets, requires you to recompile and redistribute the entire binary, which of course, includes any review time associated with the store(s) you are publishing to.
Integrating CodePush for React Native Project
I’ll share my experience, with integrating “CodePush” for React Native Project. I found code-push and react-native-code-push documentation too long. So, it took quite long time for proper integration.
We Will Be Working On:
- CodePush Account:
- Create CodePush account using the CodePush CLI.
- Register Your App:
- Register your app with CodePush and optionally share it with other developers on your team.
- CodePush-ify Your App:
- Point it at the deployment you wish to use (Cordova and React Native).
- Release an Update for Your App:
- Use CodePush to release an update.
- Check Debug Logs:
- Ensure everything is working as expected by reviewing the debug logs.
- Live Long and Prosper!
- Details will be provided.
Install and Setup the CLI
-
Install the CLI
npm install -g code-push-cli -
Register for an account via github or email
code-push register -
Register your app. We call it AwesomeApp.
code-push app add AwesomeApp
Setup React Native Project
cd to your React Native project and install the “plugin”.
npm install --save react-native-code-push@latest
Plugin integration in project
The integration experience is different for iOS and Android, so perform the following setup steps depending on which platform(s) you are targeting.
If you want configure your application for multiple deployment
https://github.com/Microsoft/react-native-code-push#multi-deployment-testing
Next, setup the sync for your component. There are more options on the syncing of the code eg. frequency, install etc.
Wrap your root component with the codePush higher-order component: example: index.android.js and index.ios.js
class AwesomeApp extends Component {
  ...
}

let codePushOptions = {
  checkFrequency: codePush.CheckFrequency.ON_APP_RESUME,
  installMode: codePush.InstallMode.ON_NEXT_RESUME
}
AwesomeApp = codePush(codePushOptions)(AwesomeApp);

module.exports = AwesomeApp
Done with the integration part. Now you can build the release version on both platforms.
Build Release Version for iOS:
Release build configuration (check your scheme), and run in Simulator or device.
Build Release Version for Android:
react-native run-android --variant=releaseStaging
Game Time : Push Live Code
Releasing updates
code-push release <appName> <updateContents> <targetBinaryVersion> [--deploymentName <deploymentName>] [--description <description>] [--disabled <disabled>] [--mandatory] [--noDuplicateReleaseError] [--rollout <rolloutPercentage>]
Make some changes to AwesomeApp now. Perhaps change a <Text>? Or a color?
Then push it:
For iOS:
code-push release-react AwesomeApp ios
For Android:
code-push release-react AwesomeApp android
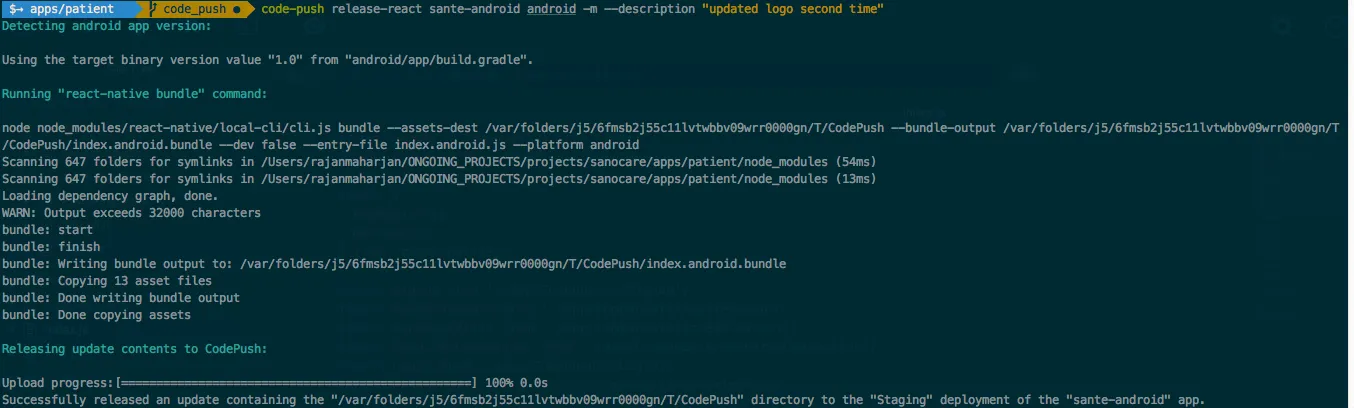
Figure 1: Code Push Example
It should show upload successful as image above.
Bring the app to foreground, and it should still be the same (though it has now fetched the update).
Bring the app to background, then foreground again, and viola! It will install the new code and reflect the changes!
Other commands:
# Release a mandatory update with a changelog
code-push release-react MyApp-iOS ios -m --description "Modified the header color"

# Release an update for an app that uses a non-standard entry file name, and also capture
# the sourcemap file generated by react-native bundle
code-push release-react MyApp-iOS ios --entryFile MyApp.js --sourcemapOutput ../maps/MyApp.map

# Release a dev Android build to just 1/4 of your end users
code-push release-react MyApp-Android android --rollout 25% --dev true

# Release an update that targets users running any 1.1.* binary, as opposed to
# limiting the update to exact version name in the build.gradle file
code-push release-react MyApp-Android android --targetBinaryVersion "~1.1.0"
Debugging the application
You can view the logs in the terminal if the app is using the codepush bundleURL
For iOS:
Debug with running simulator
code-push debug ios
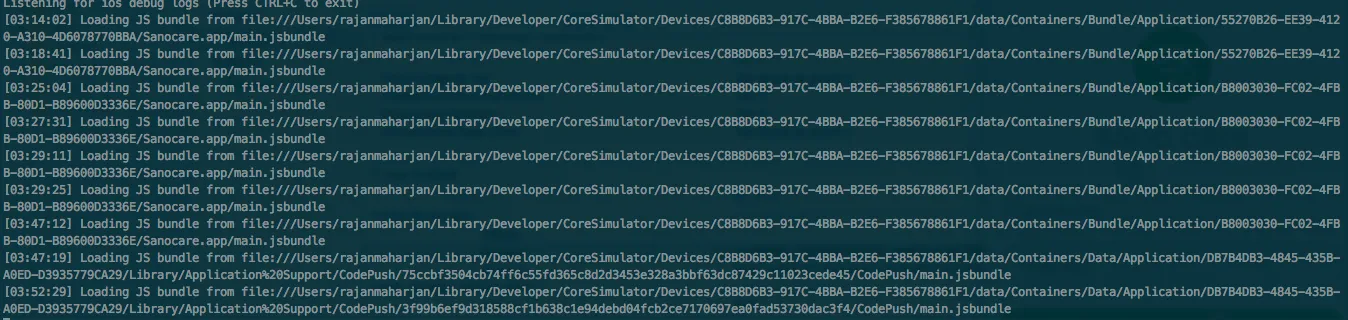
Figure 2: Code Push Debug iOS output
For Android:
Debug with with connected android device with app running.
code-push debug android
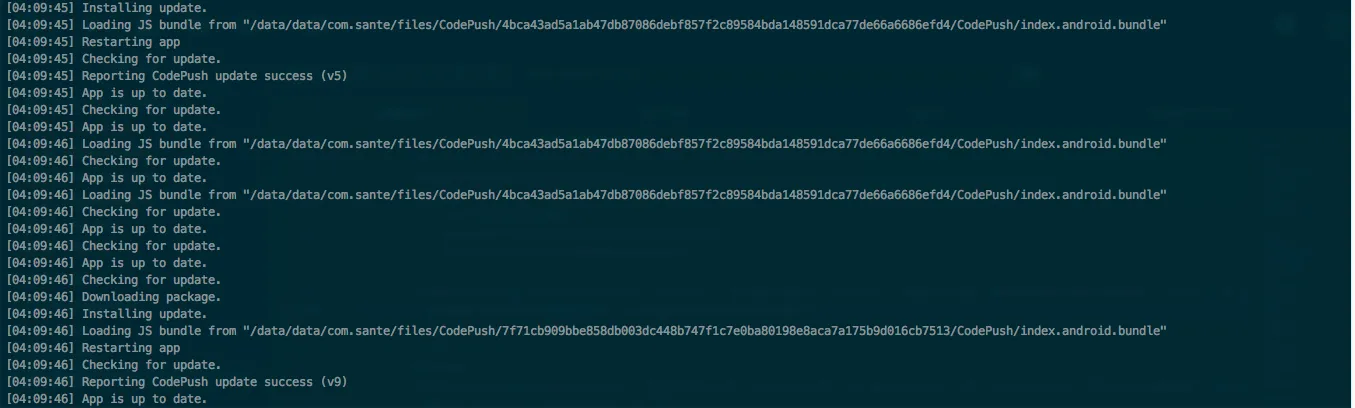
Figure 3: Code Push Debug Android output
Checking Deployment History
code-push deployment history <app name> <deploymentName>
For example:
code-push deployment history AwesomeApp Staging
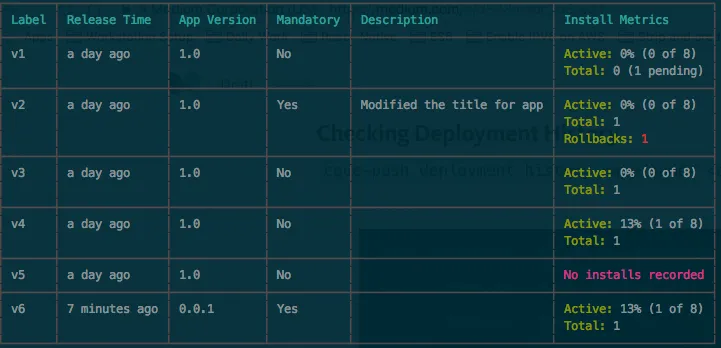
Figure 4: Deyloyment history
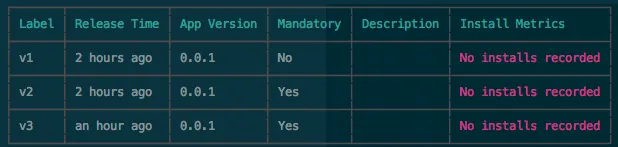
Figure 5: Deyloyment history with error
Pitfall: Not Getting Updates
There are quite some pitfalls, and the long documentation doesn’t help.
I hope this guide has been more concise (:
If you are not getting the update,
- make sure the version of the iOS app (in Info.plist), matches that when you code push with targetBinaryVersion
- make sure the app is using CodePush.bundleURL()
- make sure the keys are correct, and you deploy production/staging correctly
Anyway thanks to the official guide and http://samwize.com/2017/01/19/guide-to-integrating-codepush-for-ios-react-native-project/ for their effort.